
In 1978 Kodak used an image of a model named Shirley as their standard testing card/image. Since then every model used as a test image as adopted the nickname “Shirley”.
We can supply you with a printed “Shirley” and you can download the digital copy of the image here. This serves as a quick reference guide for you to check our printers’ output compared to your monitors calibration.
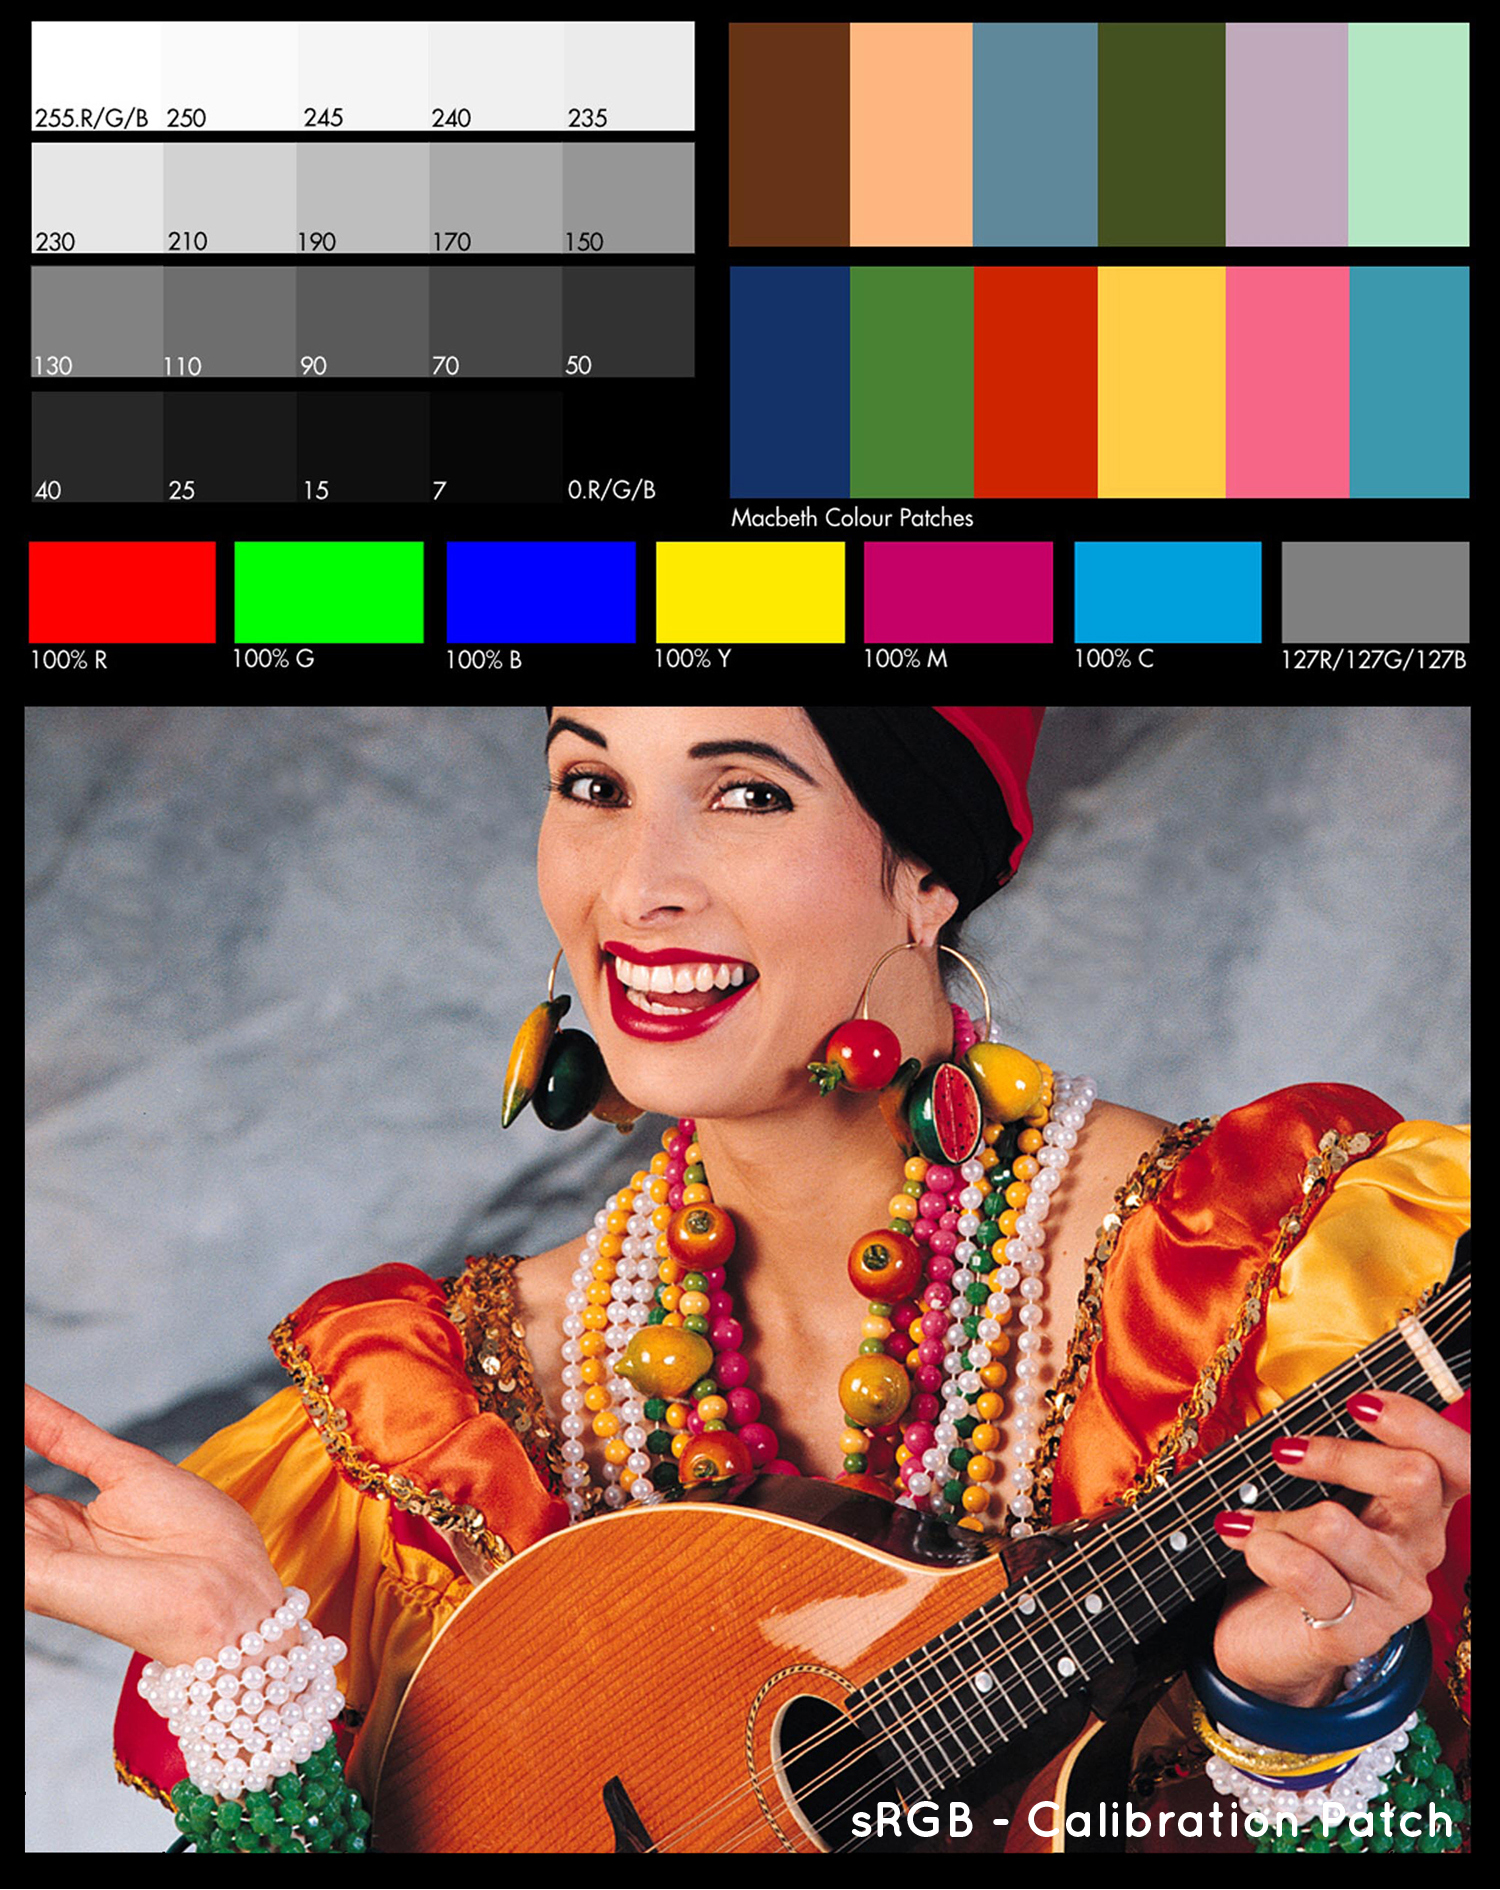
Along with the portrait demonstrating a range of colours and even skin tones is the 12 Macbeth colour patches, our printers’ 100% Red, Green, Blue, Cyan, Magenta and Yellow output and grey scale patches representing our printers density gamut.
The grey scale patches are an extremely useful tool as these demonstrate the values at which printers start to lose detail in the black and white most points of your image. For instance if you are concerned about loosing the fine details on a white wedding dress you can use the eyedropper tool in Photoshop and hover over the white most points of the image. If your RGB values for that area sit above 245 you may risk loosing detail and will need to adjust the white point in your levels. Likewise with darker areas of your print, if the values all sit below 10 where there should be details – your black point will need to be brought up a few increments.
